I created a four panel mosaic of Eta Carinae Nebula (NGC 3372) from Slooh Chile Two telescope PNG files. Each panel is just a single PNG image. The mosaic is created using only free tools. I stitched the panels together using Microsoft Image Composite Editor (ICE) and then adjusted the image using Gimp. For obvious reasons I used AstroMosaic to plan the mosaic.
Just a few relatively simple steps were required (ok, there are many steps but mostly very simple and obvious). I have described them below in case someone wants to try it. Most steps work for any image but obviously image processing done in Gimp needs to be adjusted for every image. And if you do not want to start with a mosaic those Gimp processing steps work with a single image too. I cannot guarantee that I have listed all steps correctly but hopefully it is close enough.
Planning Carina Nebula Mosaic:
- Go to Astro Mosaic Telescope Planner
- Write to target box: Carina Nebula
- Choose Telescope: C2, View: Mosaic Grid and Grid Size: 2x2
- Check panel coordinates below the image
- From target visibility graph check when target is visible and moon is not visible.
Scheduling a mosaic:
- In Slooh Telescopes go to Mission Setup (https://www.slooh.com/missions/bySlooh1000)
- Choose By Telescope
- Choose Chile Two
- Pick a time when target is visible
- Select By Coordinates
- Step 1: Select Emission Nebula
- Step 2: In RA/DEC decimal boxes write/copy coordinates from Astro Mosaic.
- Step 3: Write a descriptive name
- Step 4: Check visibility
- Step 5: For Image Processing choose Generic. Note! For example Large Bright Nebula is not good for post processing PNG file.
- Define Mission
- Repeat starting from 4) for all panels.
Processing using free tools Microsoft Image Composite Editor (ICE) and Gimp.
- Download all four .png files, use the ones with color (*_lrgb.png)
- Import them into ICE, stitch them together and export as TIFF image. Stitching is automatic.
- Load the saved composite TIFF file into Gimp.
- In Colors/Levels, change Gamma from 1.00 t0 1.80 and press ok.
- In Colors/Shadows-Highlights and set shadows to 50.
- In Colors/Brightness-Contrast set Brightness to 23 and Contrast to 6.
- In Colors/Curves adjust as you feel is best. Often a very slight S is good.
- In Colors/Hue-Saturation adjust Hue, Lightness and Saturation as you feel is best.
- If you want less stars, right click the current layer on the right, choose Duplicate Layer, select the new layer and choose Filters/Generic/Erode. Then adjust Opacity on the right as you like.
- Export the final image as .jpg. If you want to edit it later, save also as a .tif file.
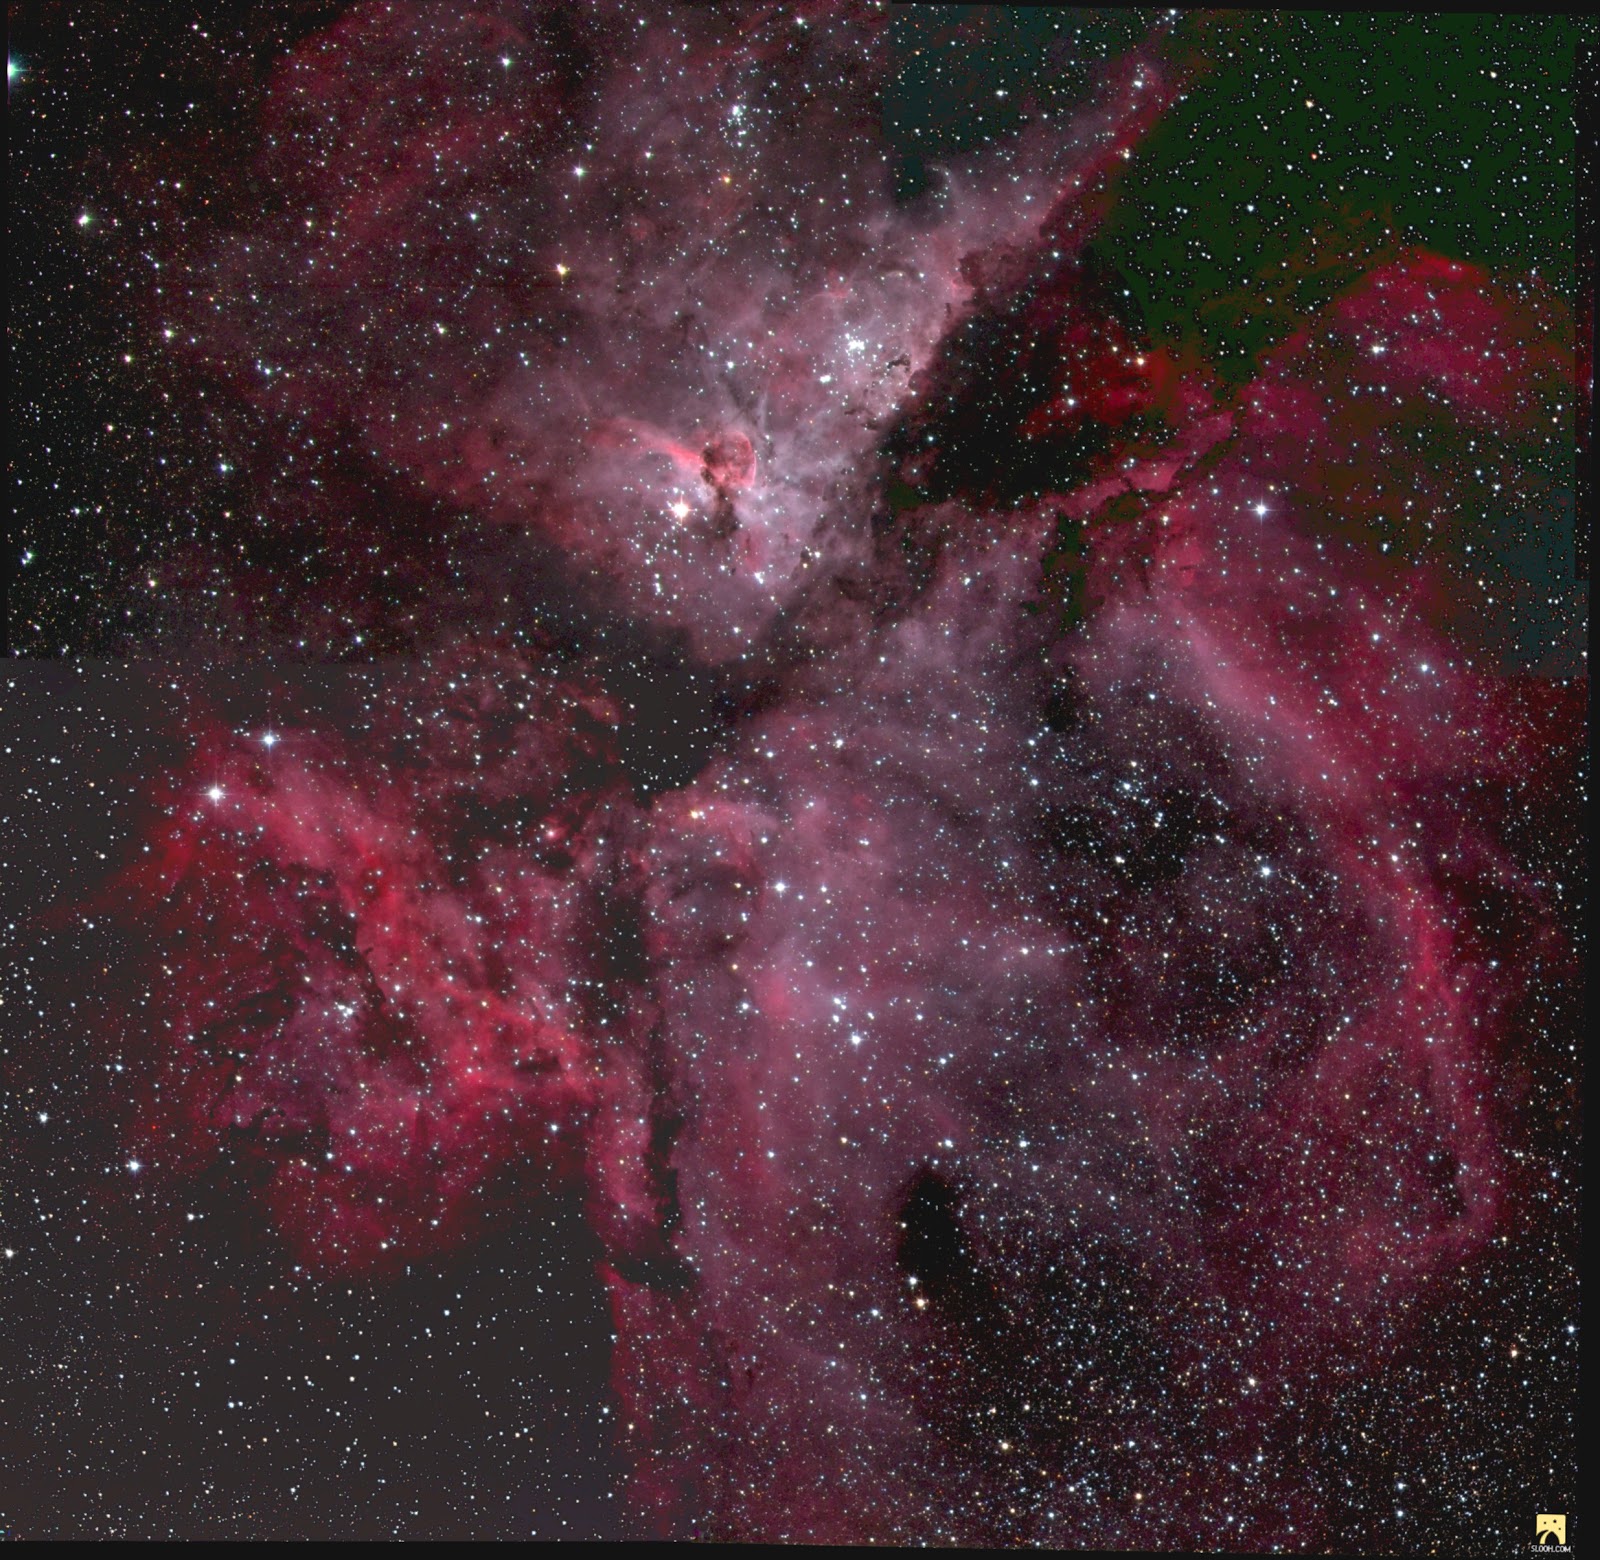
Below is the result image.
For comparison, below is my version from FITS files. Not exactly the same data as each panel is 2xLRGB. The output depends on the processing, this is the version that I like best today.
